
How to Replace a Bathroom Faucet
Update your bathroom vanity. Learn the step-by-step process to shut off water, remove old fixtures, and install a new centerset faucet cleanly.
Editorial Research Standard
Our conclusions are based on relevant manufacturer specifications, product documentation, warranties, and professional guidance. The evidence used varies by guide and is disclosed below.
Learn more in our Editorial Policy.
Replacing a worn, leaking, or outdated bathroom faucet is a highly rewarding home project. Doing it yourself saves between $150 and $300 in professional plumbing labor. Modern faucets feature simple drop-in connections and integrated supply lines, making the installation achievable in a single afternoon.
Note: This guide is formulated from manufacturer installation specifications and standard residential plumbing codes. Firsthand testing was not performed for this guide.
Project Specifications
- Difficulty Level: Medium (Requires basic tool use and working in confined spaces)
- Estimated Working Time: 1 to 2 hours
- Estimated Total Time: 2 hours
- Approximate Material Cost: $50–$150 (depending on faucet selection)
Tools and Materials
Tools Required
- Adjustable wrench (8-inch or 10-inch)
- Channel lock pliers (slip-joint)
- Basin wrench (essential for reaching tight nuts behind sink basins)
- Bucket and rags
- Flashlight or headlamp
Materials Required
- New centerset or widespread bathroom faucet
- Flexible braided stainless steel water supply lines (usually 3/8-inch compression to 1/2-inch FIP, typically 16 or 20 inches long)
- Plumber’s putty or silicone sealant (if required by faucet manufacturer)
- Thread seal tape (Teflon tape)
Safety Precautions
- Water Shut-Off: Always verify the water supply is completely shut off before loosening any plumbing connections.
- Corrosion Hazards: Older copper pipes and plastic shut-off valves can become brittle. Turn shut-off valves slowly to avoid cracking the brass stems.
- Ventilation: Ensure the workspace under the cabinet is cleared to avoid hitting your head on plumbing traps.
Step-by-Step Instructions
Step 1: Shut Off the Water Supply
Locate the hot and cold water shut-off valves directly beneath the sink. Turn both valves clockwise until they stop. Open the faucet handles above the sink to relieve pressure and drain remaining water.
- Troubleshooting: If the valves under the sink are seized or leak when turned, you must shut off the main water valve to the entire house before proceeding.
Step 2: Disconnect the Supply Lines
Place a bucket and rags directly under the shut-off valves. Using an adjustable wrench, loosen and remove the flexible supply lines from the shut-off valves and faucet shanks. Empty the water into the bucket.
Step 3: Remove the Old Faucet & Drain Assembly
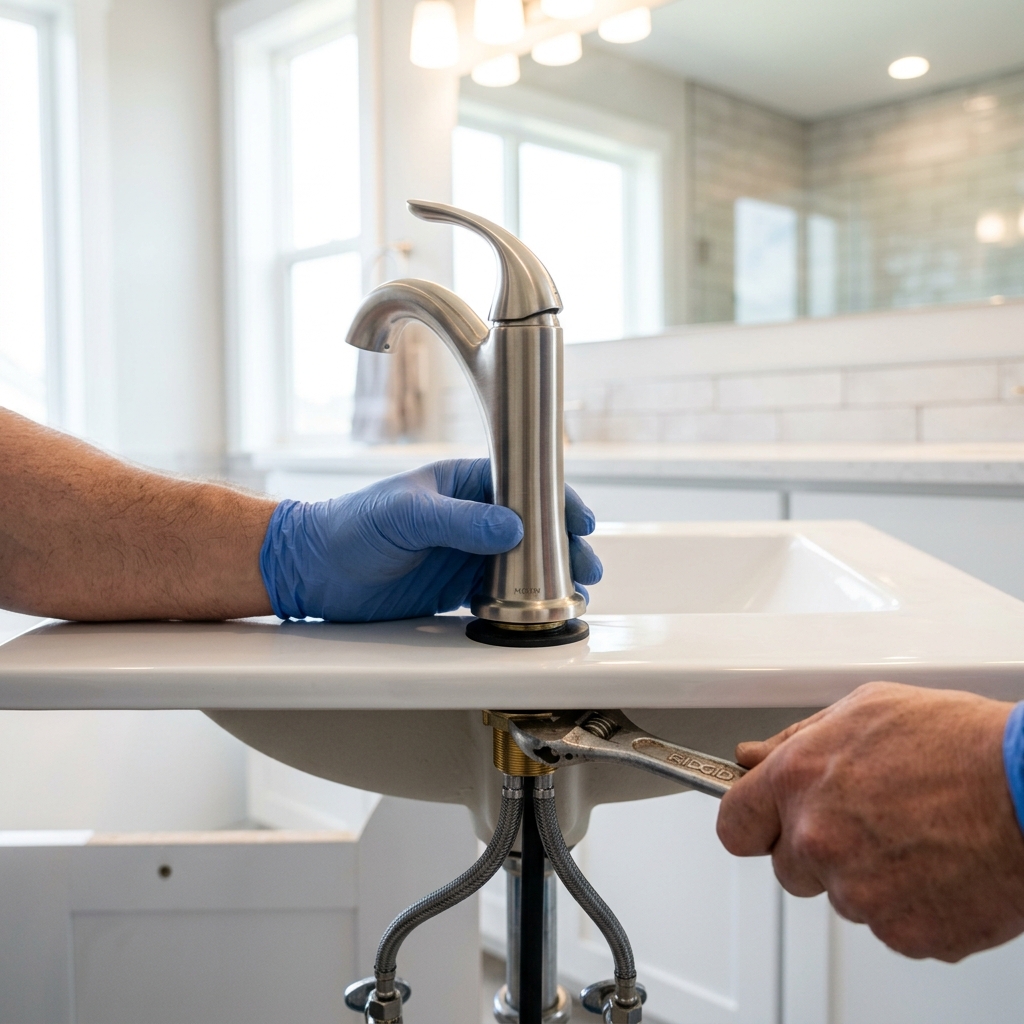
Underneath the sink basin, use a basin wrench or deep socket to remove the mounting nuts securing the faucet to the sink deck. Pull the old faucet up and away from the top of the vanity.
- Disconnect the pop-up drain linkage rod. Loosen the large locknut under the sink securing the old drain pipe, and push the drain flange out from the top.
- Scrape away any old dried plumber’s putty or calcified buildup on the sink deck using a plastic putty knife to avoid scratching the porcelain or stone.
Step 4: Install the New Faucet
Many modern faucets include a rubber gasket on the bottom to seal against the sink. If yours does not, apply a 1/4-inch bead of plumber’s putty along the underside perimeter.
- Lower the new faucet shanks through the mounting holes in the sink deck.
- From underneath, slide the washers over the shanks and tighten the mounting nuts by hand. Use a basin wrench to snug them up—do not overtighten, as this can crack porcelain sinks. Wipe away any excess putty that squeezes out from the top.
Step 5: Install the New Drain Flange
Apply a thin ring of plumber’s putty around the underside of the new drain flange. Push the flange down into the sink drain hole.
- From underneath, slide the rubber gasket, plastic washer, and brass locknut over the drain body. Tighten the locknut with channel locks.
- Re-connect the slip-joints to the P-trap. Connect the pop-up drain linkage rods.
Step 6: Connect Supply Lines and Flush
Apply Teflon tape (3-4 wraps clockwise) to the threads of the faucet shanks and shut-off valves. Thread the new braided stainless steel lines onto the shanks and shut-off valves. Tighten them with an adjustable wrench until snug, then add another quarter-turn.
- Flush the System: Unscrew the aerator nozzle from the end of the new faucet spout. Turn the water shut-off valves back on slowly. Open the faucet valves (both hot and cold) for 1 minute to flush out any manufacturing debris or air pockets that could clog the aerator. Re-install the aerator.
When to Call a Professional
Stop working and contact a licensed plumber if:
- The shut-off valves under the sink are frozen, corroded, or leak after turning.
- You encounter damaged copper lines, galvanized iron pipes, or corroded threads that show signs of thin walls or stress cracks.
- You find mold, wood rot, or active leaks behind the vanity wall or underneath the floorboards.
- Note: Always follow the specific faucet and compound manufacturer instructions, as mounting mechanisms, gaskets, and torque requirements vary by product brand.
Common Mistakes and Troubleshooting
- Mistake 1: Overtightening Plastic Nuts: Hand-tighten plastic nuts under the vanity basin. Using metal pliers on plastic threads easily strips them, causing slow drips.
- Mistake 2: Cross-Threading Fittings: If a nut does not turn smoothly, stop. Back it off and restart. Cross-threaded lines will leak under pressure.
- Leak Troubleshooting: If a joint drips after turning the water back on, turn the shut-off valve off, loosen the nut, ensure the rubber washer inside is seated flat, apply Teflon tape, and retighten.
Cleanup
- Dry all pipes and structural wood flooring inside the vanity cabinet.
- Leave the empty bucket under the drain lines for 24 hours. Check it occasionally to verify no micro-drips occur during use.
- Dispose of old metal faucets and plastic pipes in accordance with local recycling rules.
Sources & Citations
- International Code Council: 2021 International Plumbing Code Section 607 (Accessed July 2026) - Guidelines regulating plumbing material pressure limits and water distribution standards.
- Moen Incorporated: Moen Faucet Installation Help Guide (Accessed July 2026) - Official torque limits, alignment parameters, and tool recommendations for bathroom vanity installations.
DwellNinja Editorial Team
Objective Homeowner Advice
The DwellNinja Editorial Team researches manufacturer documentation, product specifications, warranties, and professional guidance to produce practical homeowner guides.
Become a smarter homeowner
Get our twice-monthly homeowner guides and product insights sent directly to you.
Related Guides You Might Like
How to Install a Wall-Mounted Shelf Safely
Avoid sagging shelves and wall damage. Learn how to locate studs, choose the correct anchors, and mount heavy shelves securely.
How to Patch a Small Hole in Drywall
A complete step-by-step homeowner's guide to repair wall holes up to 4 inches wide with professional-looking, seamless results.